 When I set out to put together my Vet squad, I had in the back of my mind the idea to give them Jetpacks. Not that I have a Valkyrie in my inventory yet, but the plan is to give these guys some more fluff when the defense budget allocates funds for air transport. You can see on the left the end result of my
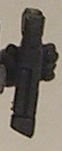
  effort and on the right the inspiration for it, a Forgeworld Elysian jetpack. I wanted my vets to have a combination jet and back pack, so mine ended up being a bit bigger.
 This conversion starts out with a pack of Chaos Jetpacks. Of course, all the chaos-y symbols and pointy bits need to be removed first, and to get them a bit shorter I took out the bottom pair of thrusters. I also removed the round thrusters from the top, as I wanted them to look more like the Forgeworld example.
  It took a couple weeks before inspiration hit me on how to achieve this without a lot of effort and preferrably using something readily available. What first came to mind is to use the rounded ends of sprues, as shown in this picture. These are ideal, because they are the right shape and size to pull this off. Unfortunately, unless you've been saving empty sprues, there is usually not enough available to complete a squad of jet packs.
  Additionally, they come in different sizes, and the thinner ones are too small. So, what else is there to use? Not so easy, but certainly as cheap and usable, is using a sanding bit and "converting" cut sprue ends to round sprue ends, then cut to desired length. The advantage here is they are all the same size, and you can cut them to whatever length you prefer.
As I was going for the back pack look,
 I also removed a lot of the symbols, hoses, fans and other obvious jet pack bits, and hauled out the last of my green stuff. I tried to create a soft, fabric looking pack, using SM belt pouches for the outer pockets. While this was simple enough, it was a bit time consuming. So I switched over to a sleek, more aerodynamic, "aluminum case" design. You can see this version in the picture here. You can also see the top thrusters before they were attached. The little silver bit on the thruster was found in my wife's bead box. I was looking for a small bead to use here, but she didn't have anything small enough. I found instead what is called a crimping bead. It looks good, but it's long and requires drilling into the sprue bit to make it work. Being designed to crimp, cutting wasn't an option with the tools I had. Were I to visit a bead store to find more, I'd choose a small bead or at least a shorter version of the crimping bead.
 Here is the collection of 8 of 10 finished, partially-painted IG jetpacks. All total, there are six "hard cased" packs, two plasma (or melta) packs, one grenade launcher pack and one comm pack. The comm pack started out as a Vox caster, with some rearranging of the extras, an added soft pack on the bottom, and jets on the sides. The jet struts were simply cut off the Chaos jetpack, glued to the comm pack, and then the sprue thrusters added.
 And here's a view of two finished ones for size comparison. They're a little bigger than my initial vision of them, but not so much that I'd reconsider the design. This was a relatively simple conversion. The only concern, other than the green stuff work, is the need to build up the back a little to allow the top bulge to clear the figure's head. I used scrap plasticard to do this. Like many of my projects, they're waiting for me to quit procrastinating with the paint pots.
 The three fingered Tau hands were easy to fix using hand swaps or creative filing. The biggest challenge was changing hooves to feet.


 Plasma Pistols usually come with two options. A right hand, and a left hand (note this picture is not in the same scale as the Boltguns):
 You’ll need to cut them on the lines as shown below. Make sure you hold on to the flash suppressor and whatever that small bit is above it. You’ll need it later. For those of you comfortable with a blade, you don't have to cut the upper left corner bit on the Boltgun off. I left mine on because I liked that look better, but it can be glued back on too.

 Once you've got the pieces cleaned and ready, you can install and paint, like I’ve done below. Again, I can't show the whole figure until the contest is over, so here’s some close-ups for WIP purposes. If you want to see the whole set, go visit


 Some of you might have wondered why there were extra red line cuts on the Tau Carbine above. One of the notes in the new Codex offered that veterans have access to unique equipment. To help show this, I created a new type of binocular for one of them. I got the pieces from the extra cuts shown above, and here's a closer look.

 So, if you want to add a bit more to your vet, add one or two of these pouches to show where he keeps his extra fluff!


